1. Please go to 'Setting' then 'Wi-Fi' on your iPhone/iPad/iPod touch. You will see 'AD_Nexus_XXXXX there (where XXXXX is the serial number of your Nexus found on the back of Nexus), select it.
Nexus will be connected in a few moments.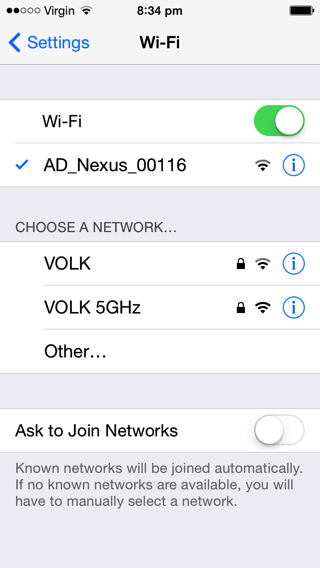
Run SkySafari Plus/Pro, go to 'Settings' -> 'Telescope' -> Setup'.
Under 'Communication Settings': set the 'IP address' to 10.0.0.1, 'Port Number' to 4060. Set 'Scope Type' to 'Basic Encoder System'. The 'Readout Rate' can be either set to '10 per second' for reduced lag or it can be set to default '4 per second'. 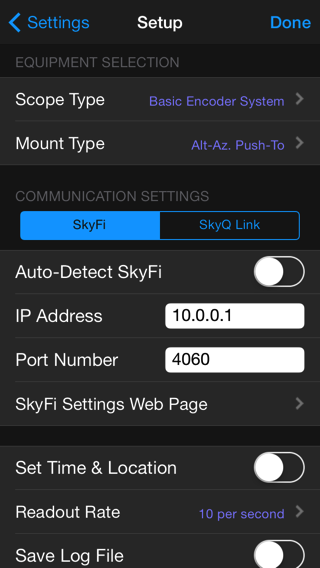
Set 'Mount Type' to 'Alt-Az. Push-To’ for example. Under 'Encoder Steps Per revolution' set both 'RA/Azm' and 'Dec/Alt' to the number of steps per revolution of the corresponding encoders (10000 in this example). Please turn off 'Get Automatically'.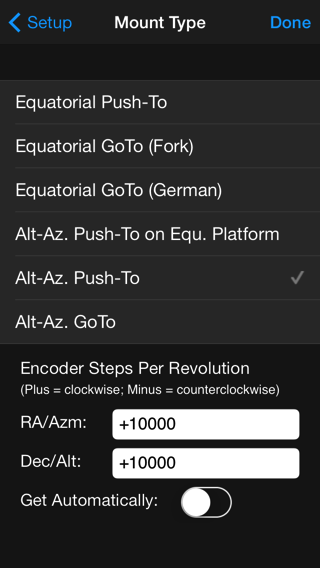
The setup is now finished.
Now you can bring up the scope panel and hit 'Connect'. 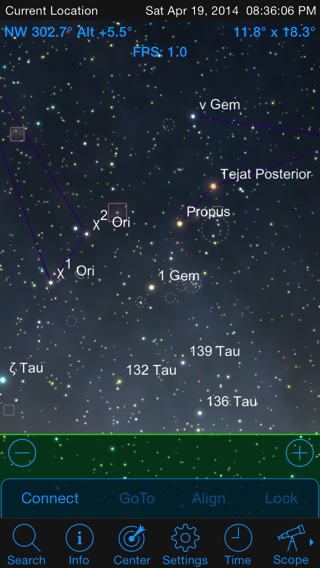
Now SkySafari Plus/Pro should show a telescope cursor on the screen. Moving the telescope will result in the cursor movements on the screen.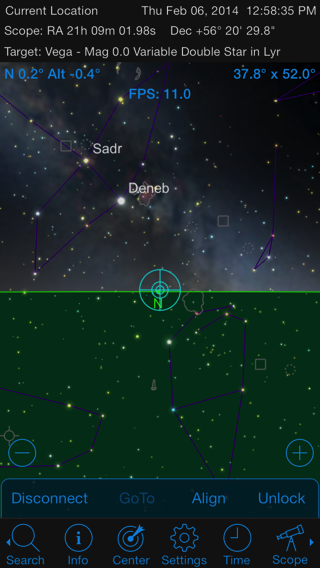
Please use SkySafari's two star alignment procedure under the real sky:
Select a star, aim the scope, press 'Align'. 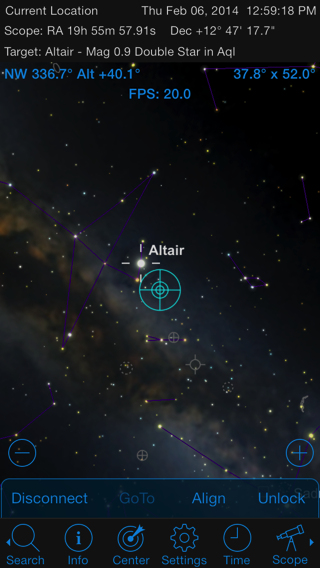
A pop-up message box will ask you whether to use it as an alignment object or cancel, press 'Align'.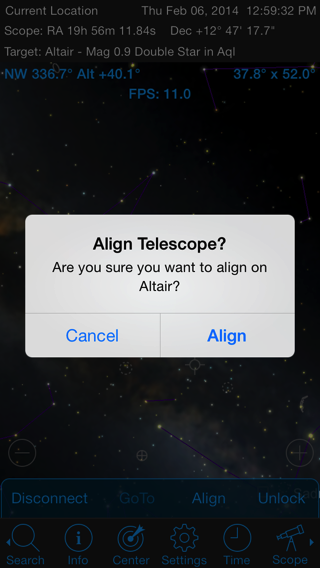
Select another star, aim the scope, press 'Align', a pop-up message box will ask you whether to use it as an alignment object or to restart the alignment procedure, press 'Align' now: 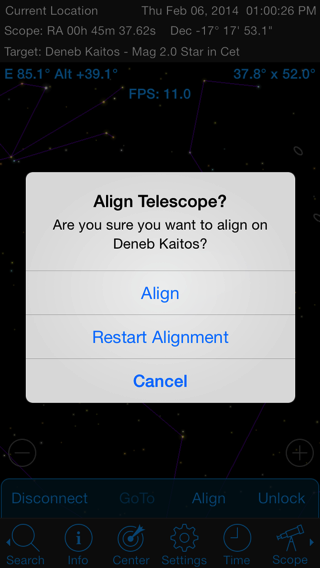
Done!
Now SkySafari Plus/Pro will be showing you exactly where the telescope is pointing.